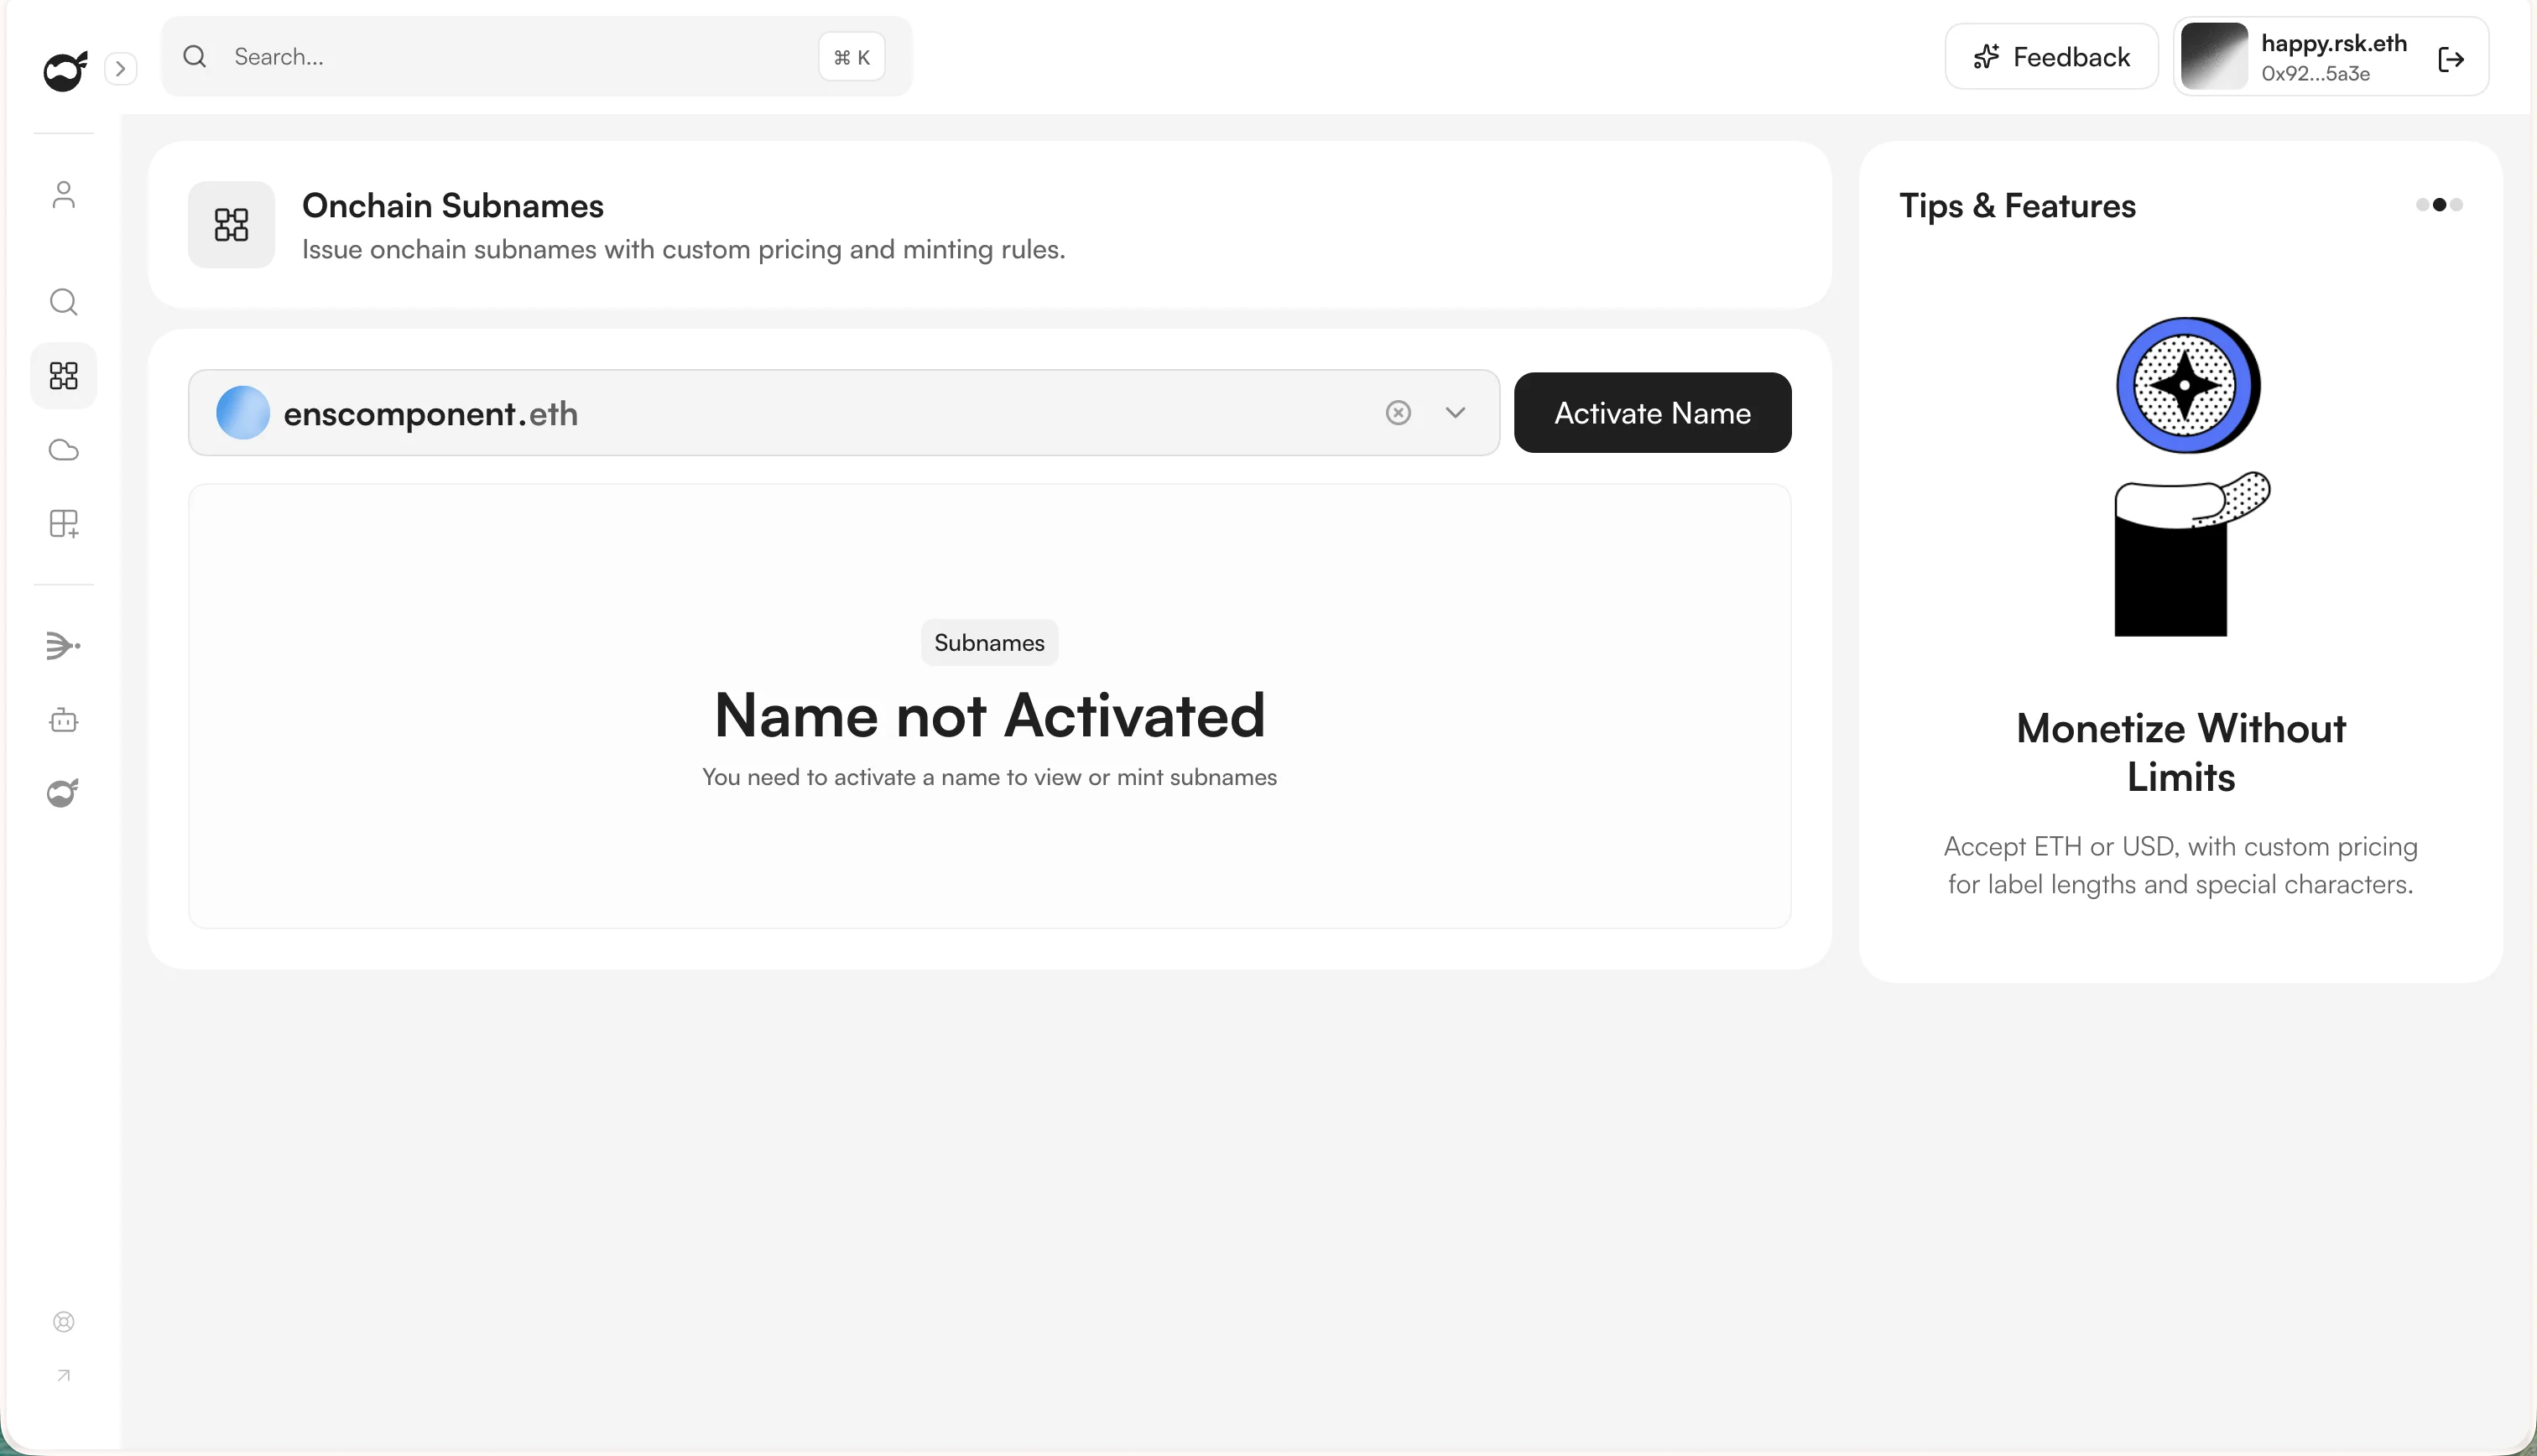
To mint subnames from the Namespace App, ENS Widget, or via the SDK, you must first activate your ENS name from the Onchain section of the Namespace App.
Names activated on Ethereum L1 cannot be migrated to Namechain (ENS v2). If you plan to use Namechain, activate on a supported L2 (Base or Optimism) instead.
How to Activate an ENS Name
1
Open the Onchain section
- Visit app.namespace.ninja/onchain.
- Connect the wallet that owns the ENS name you want to activate.
- Select your ENS name from the dropdown at the top, then click Activate Name.
2
Choose the listing type
Pick where subnames will be issued: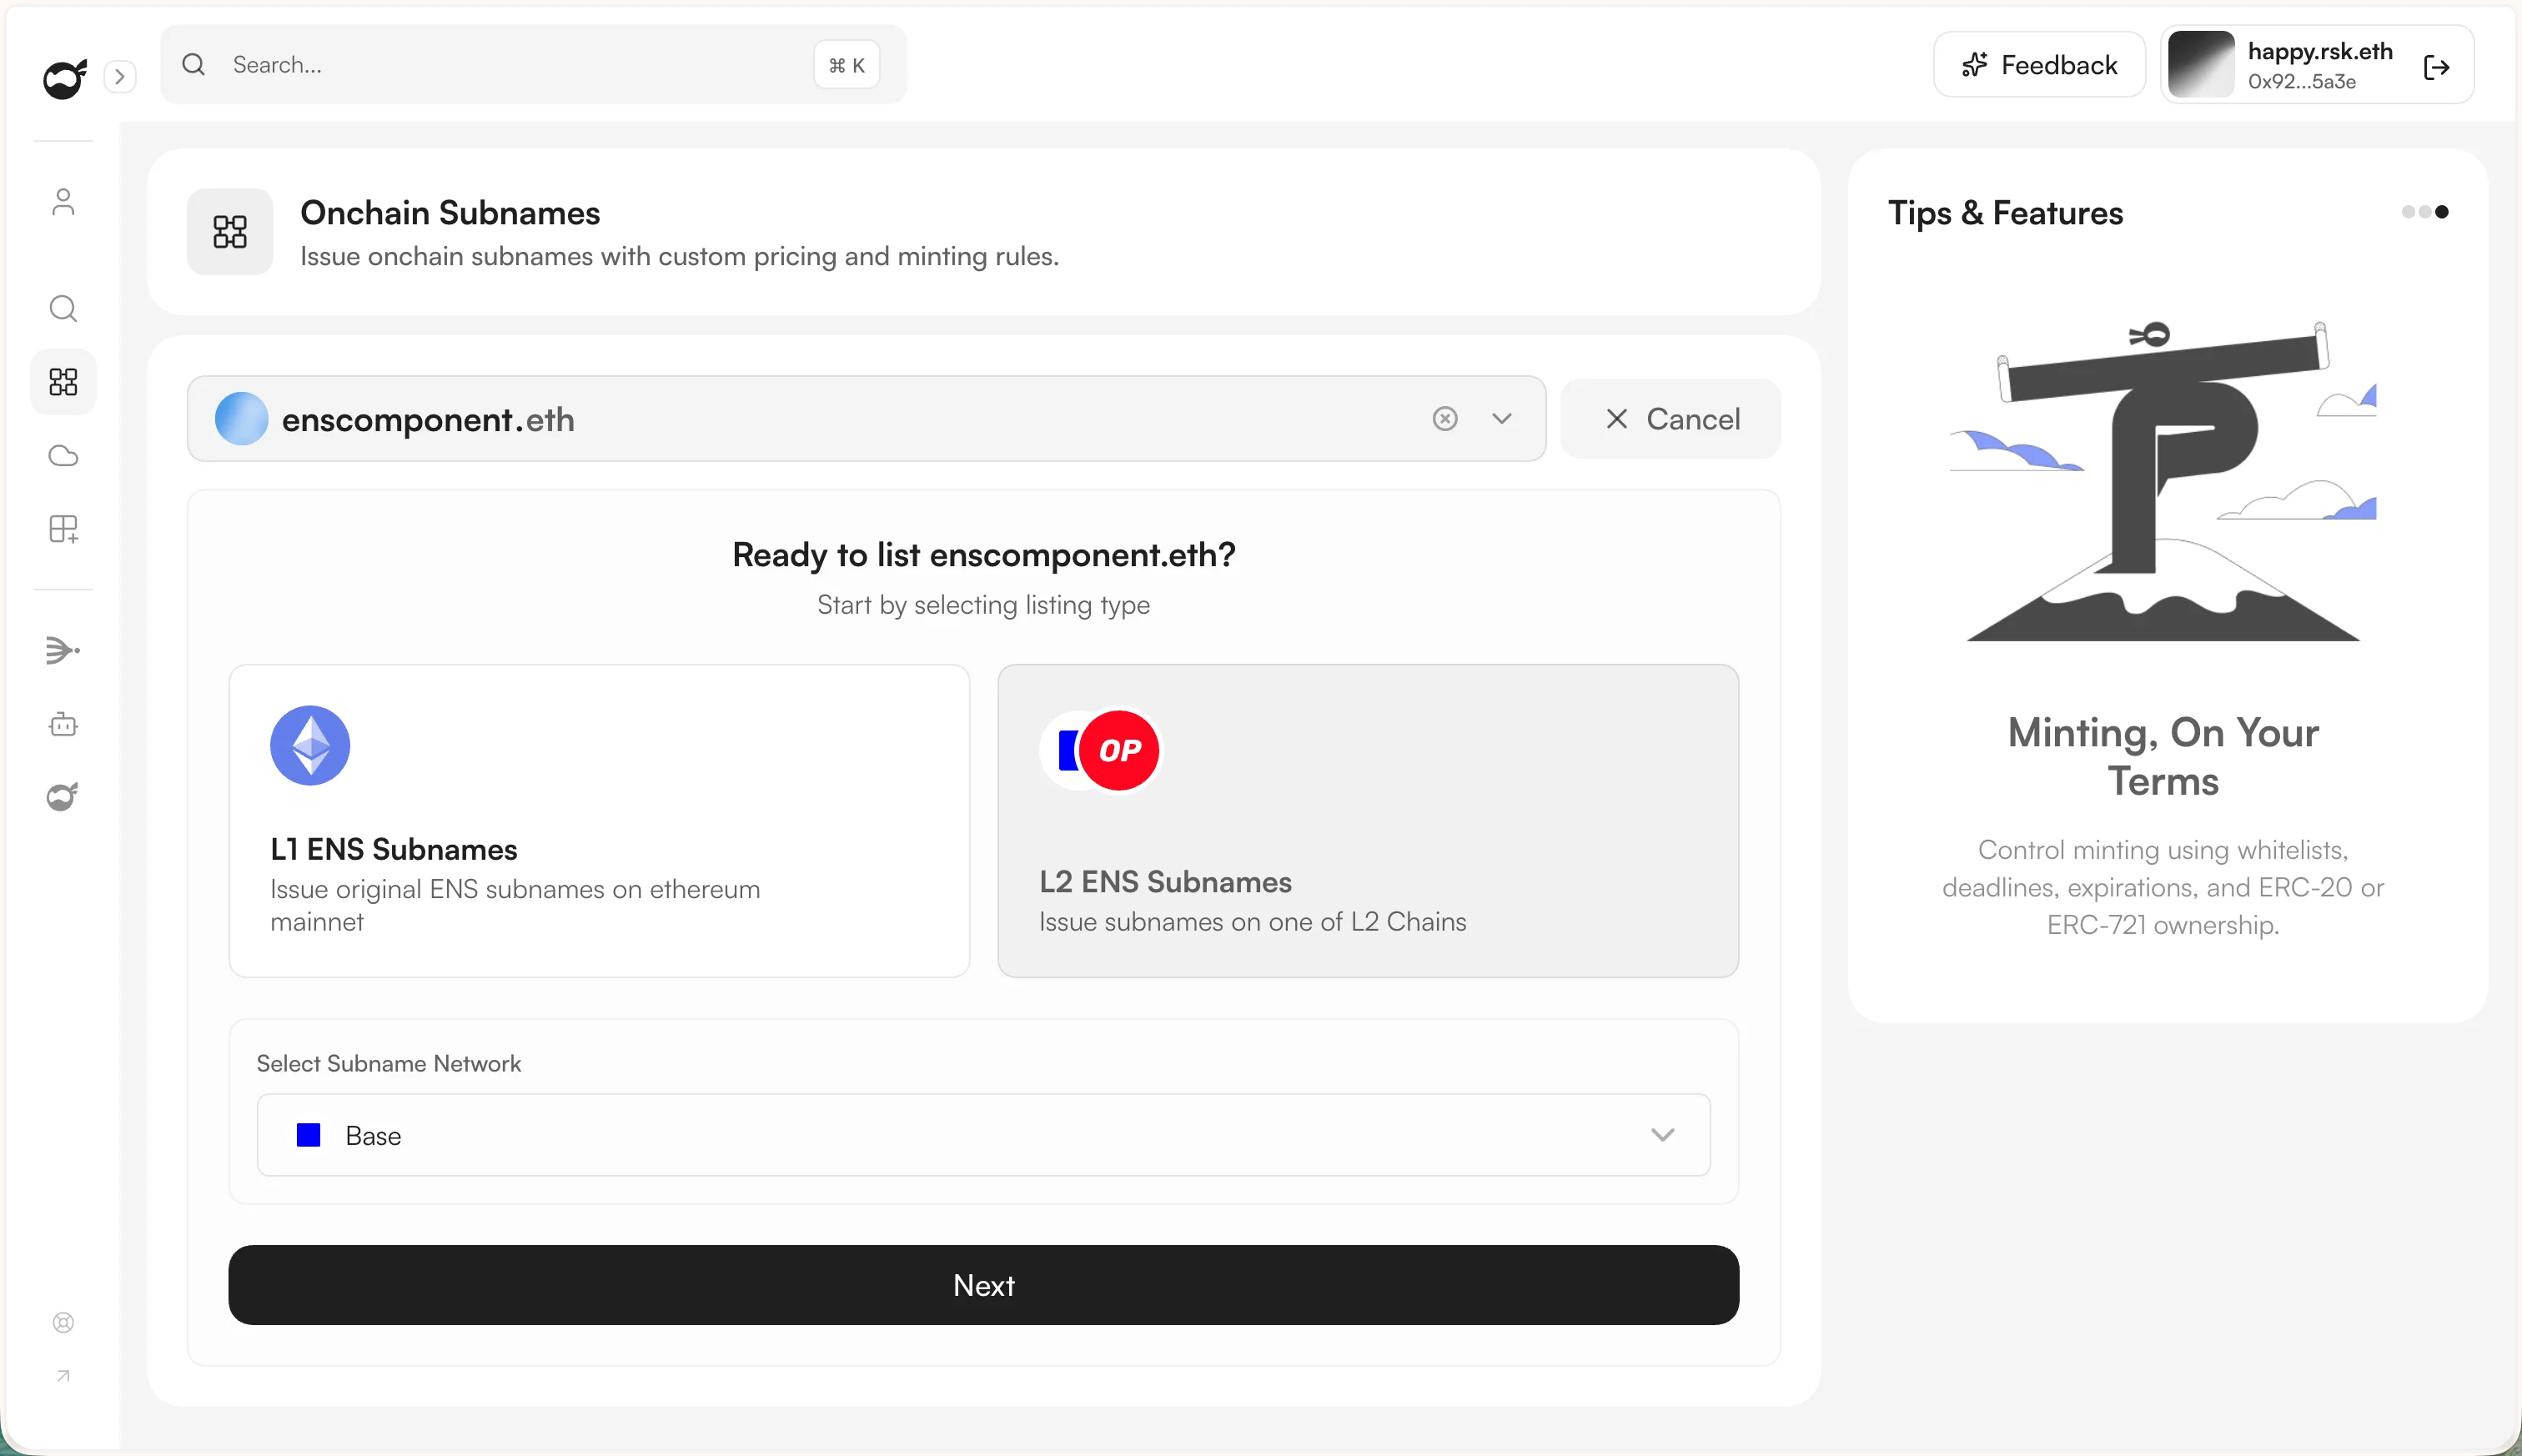
- L1 ENS Subnames — issue original ENS subnames on Ethereum mainnet.
- L2 ENS Subnames — issue subnames on a supported L2 chain (Base or Optimism). Pick the network from the “Select Subname Network” dropdown.
3
Setup — base activation properties
Configure the collection: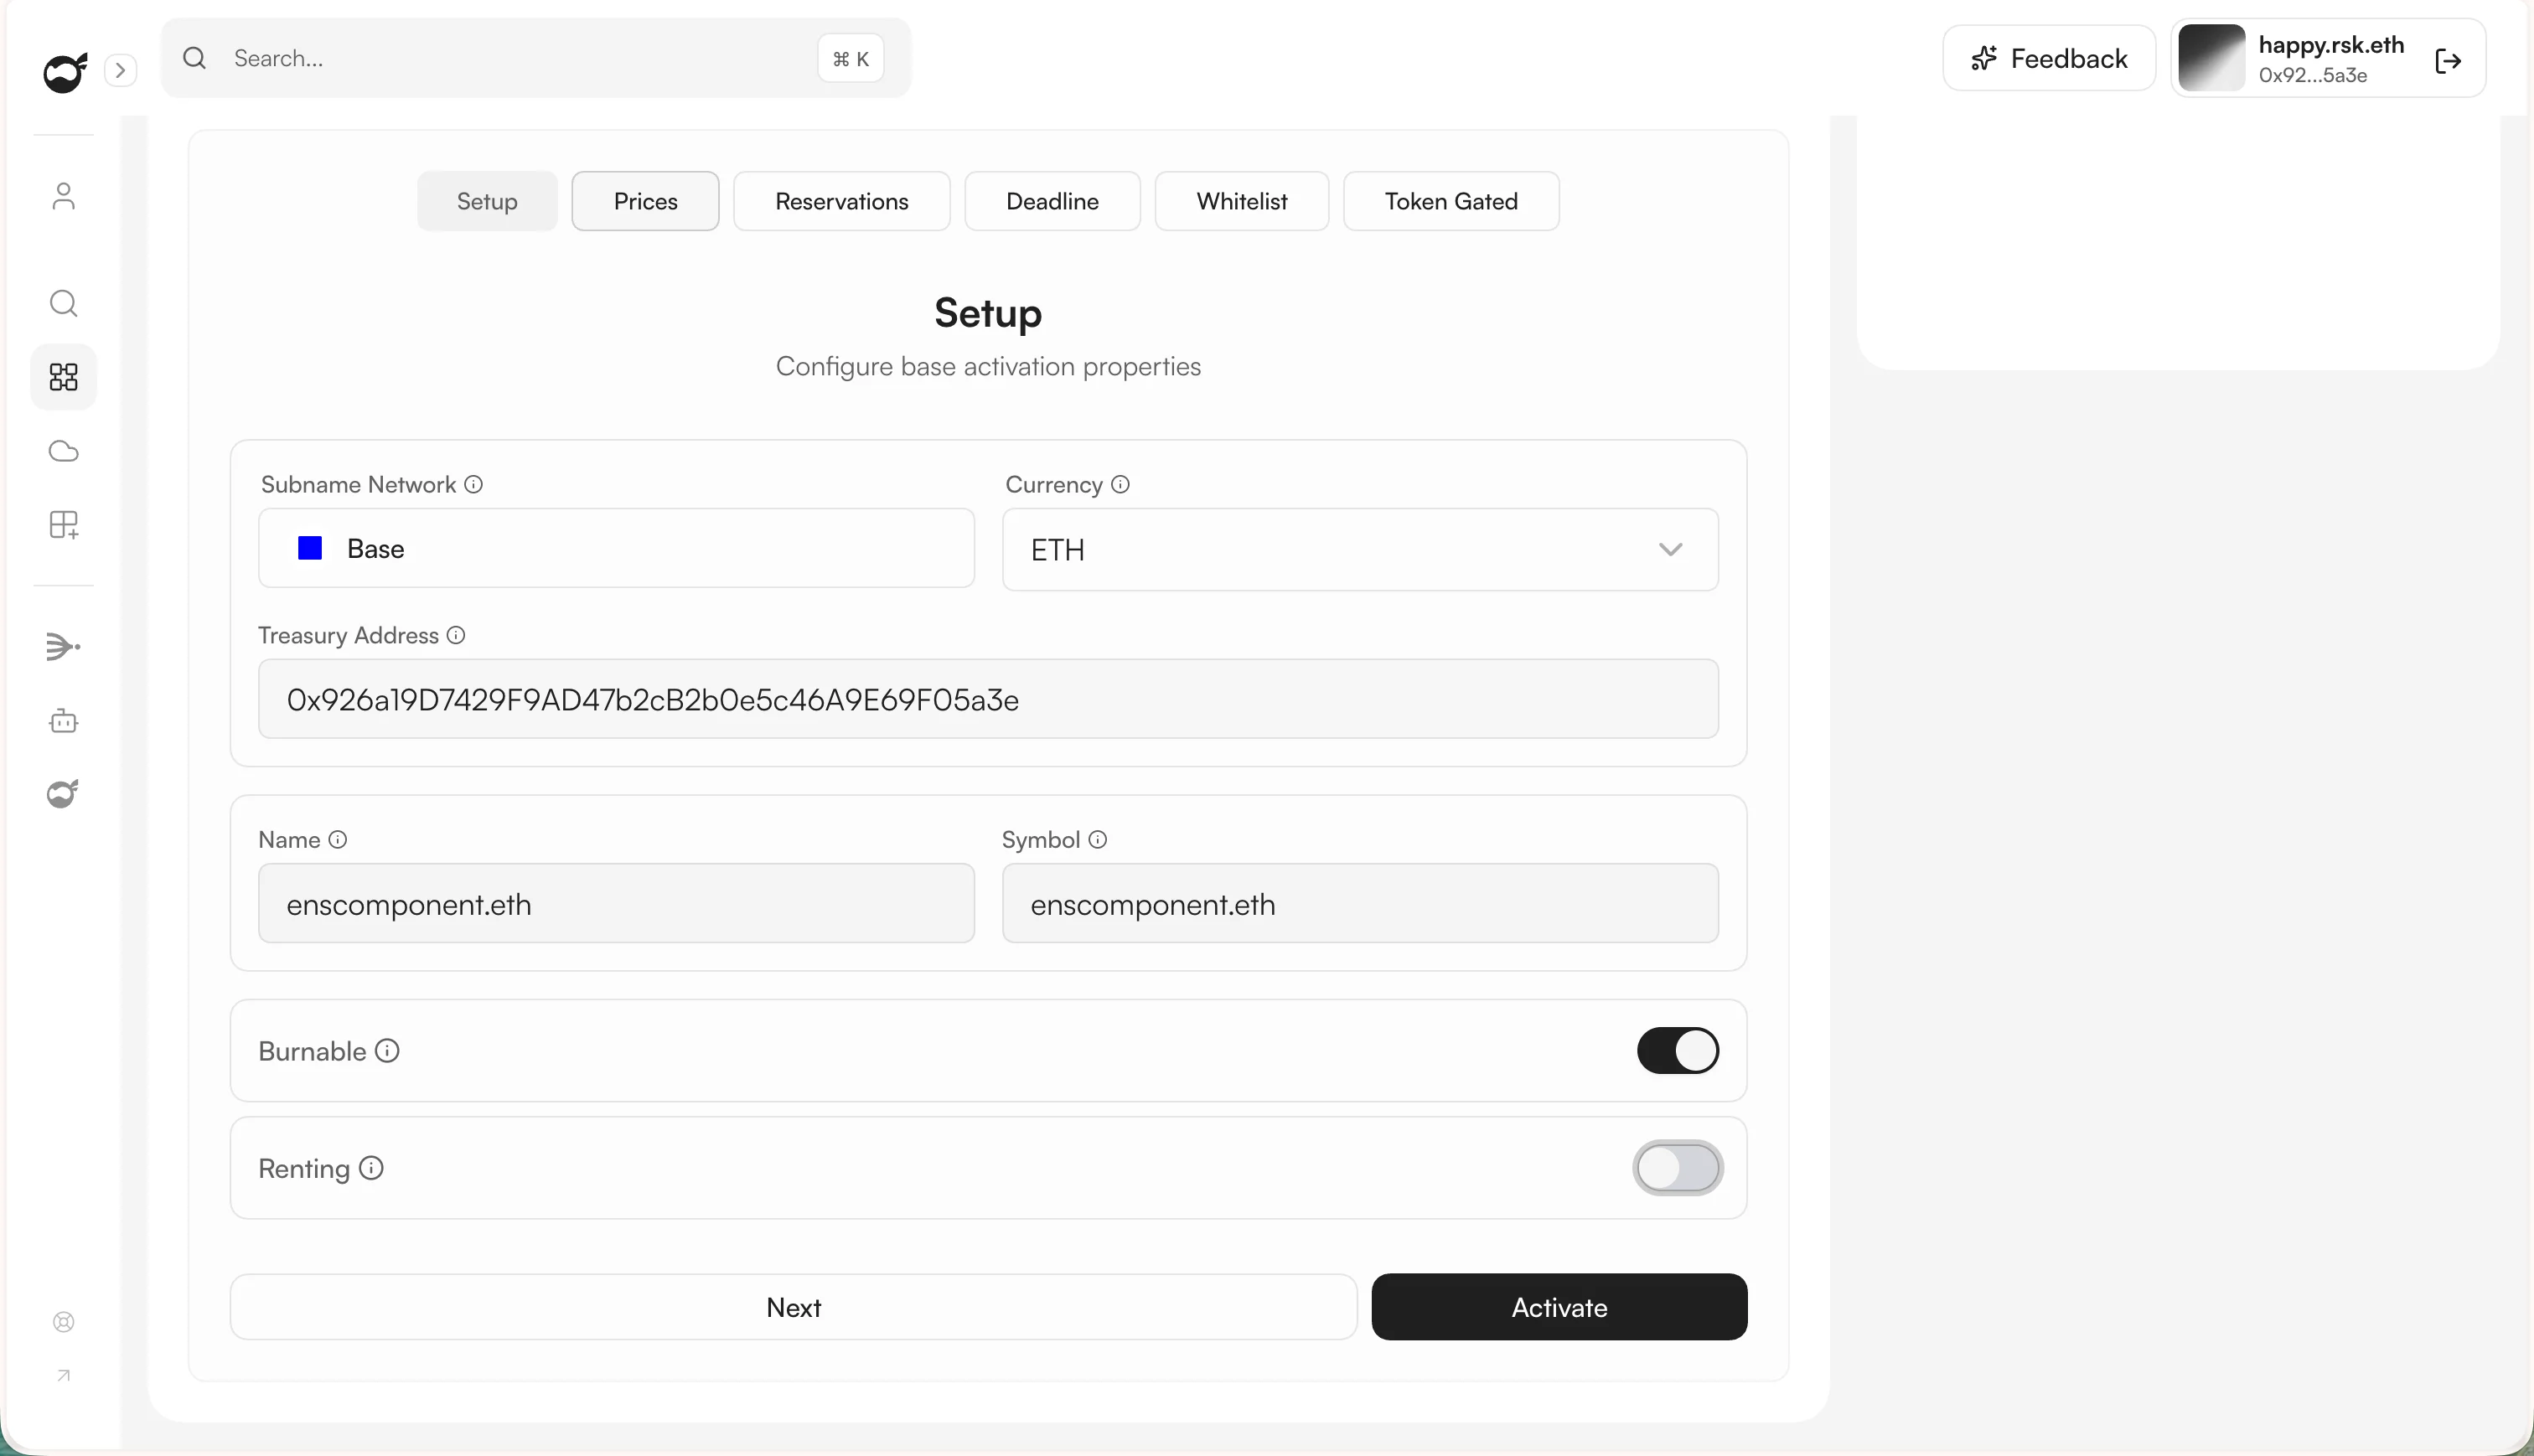
- Currency — the token mint fees are collected in (e.g. ETH or USD).
- Treasury Address — wallet that receives mint revenue.
- Name and Symbol — collection metadata.
- Burnable — allow subname holders to burn their subname.
- Renting — allow time-bound subname rentals.
4
Prices — mint pricing rules
Set how subnames are priced: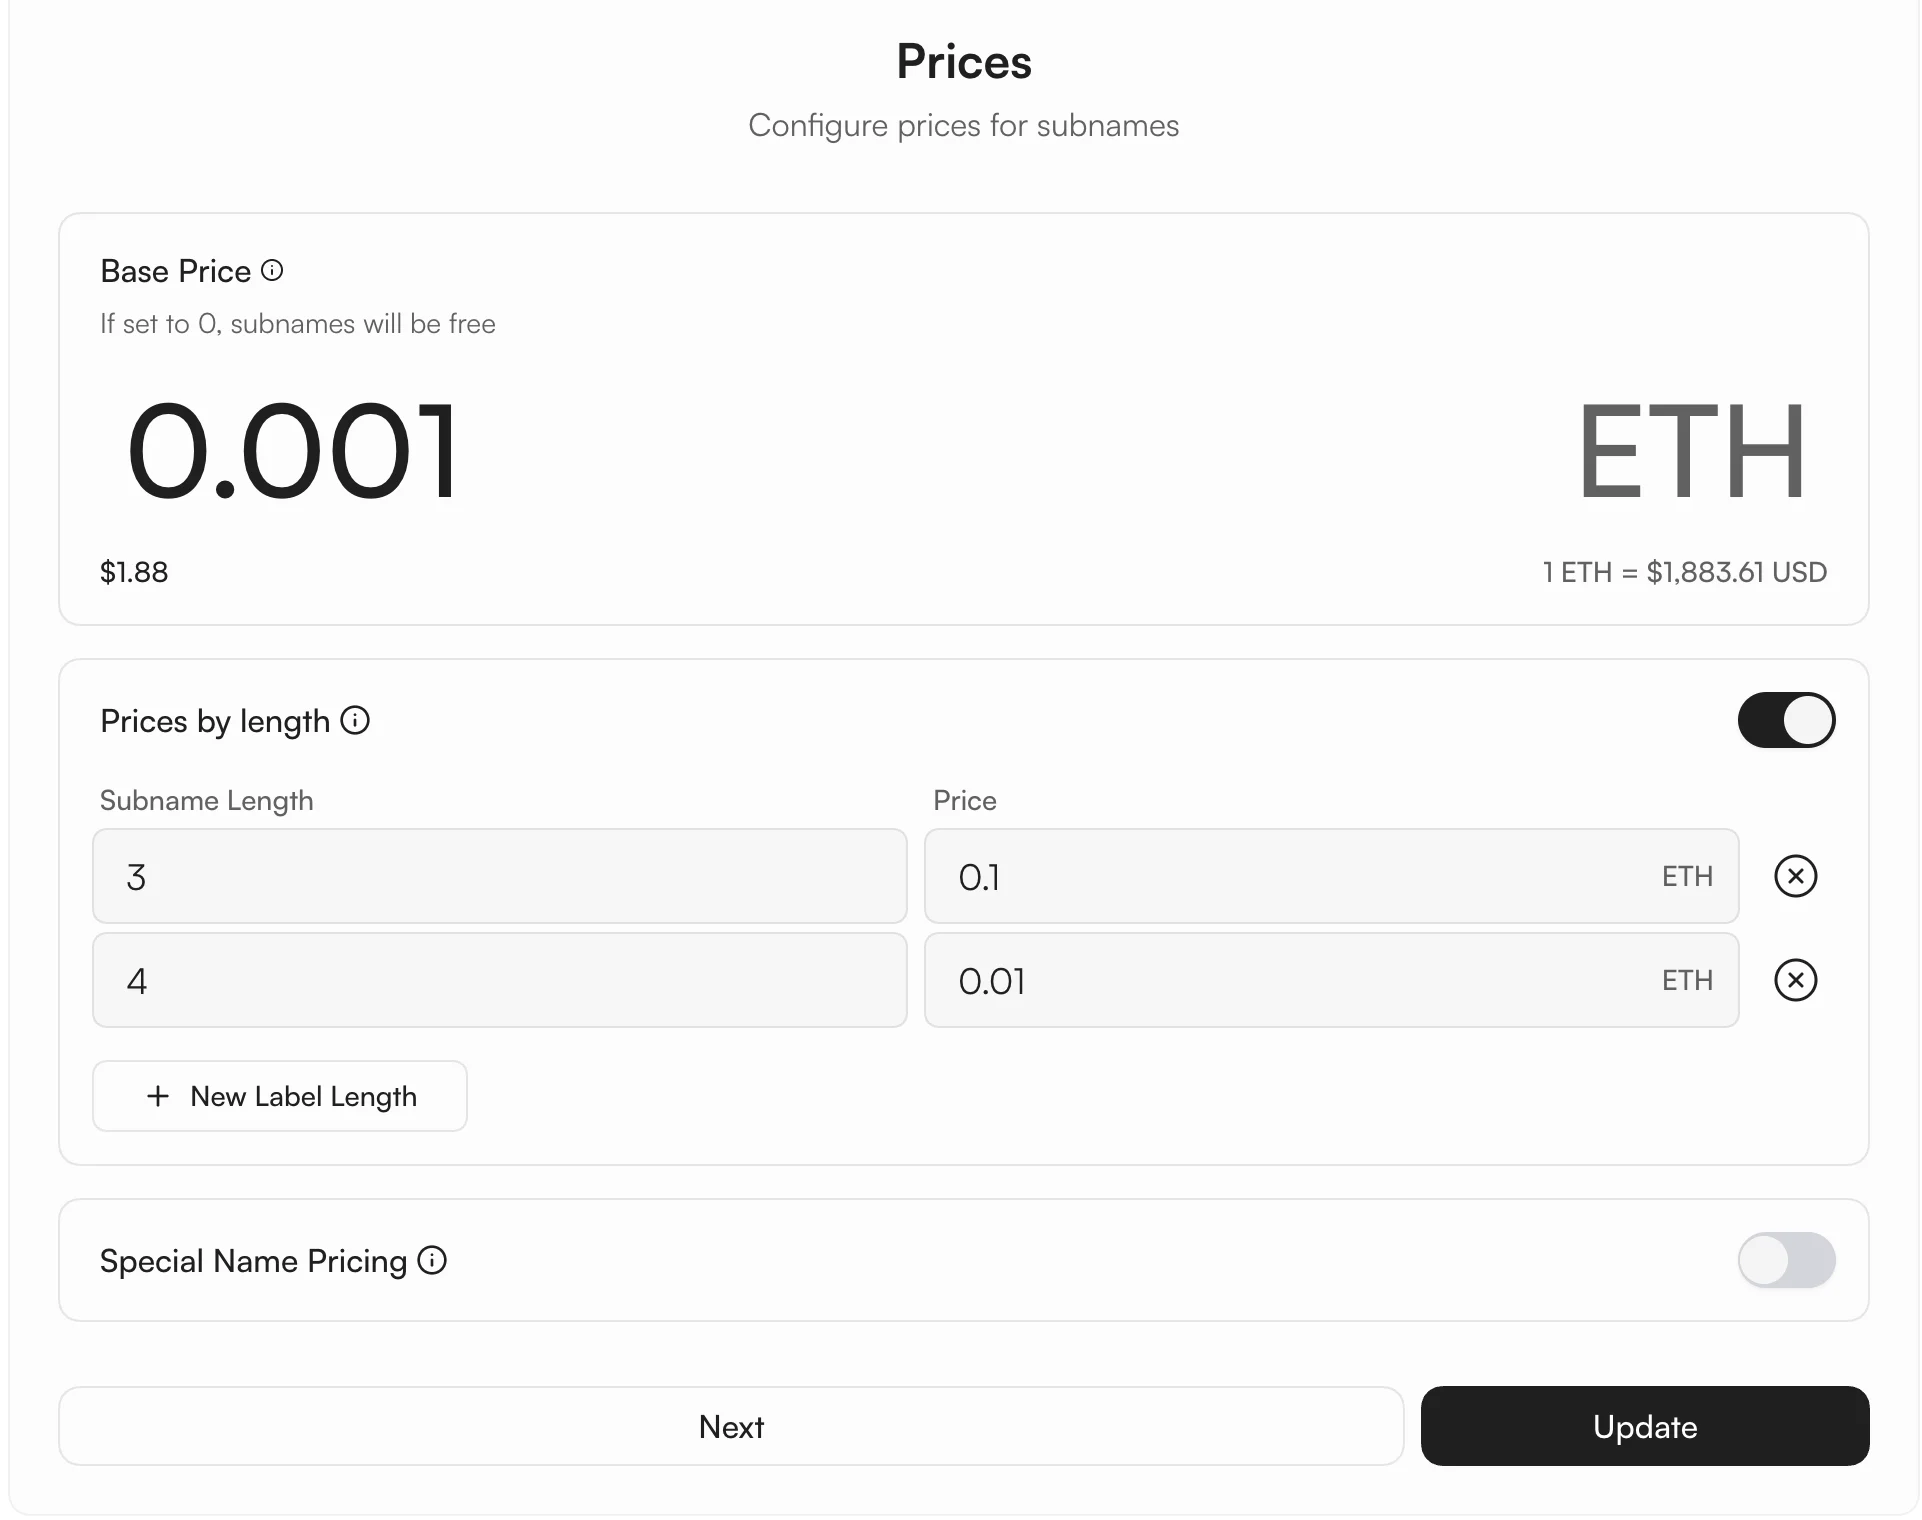
- Base Price — default price for every subname. Set to
0to make subnames free. - Prices by length — override price for specific subname lengths (e.g. 3-char names cost more).
- Special Name Pricing — custom rules for emoji-only, numbers-only, or other patterns.
5
Reservations — block or specially price specific subnames (optional)
Reserve subnames so they either cannot be minted at all (set Mintable off → “No Mint”) or are minted at a specific price different from your base rules.Add reservations one-by-one or bulk-import via CSV.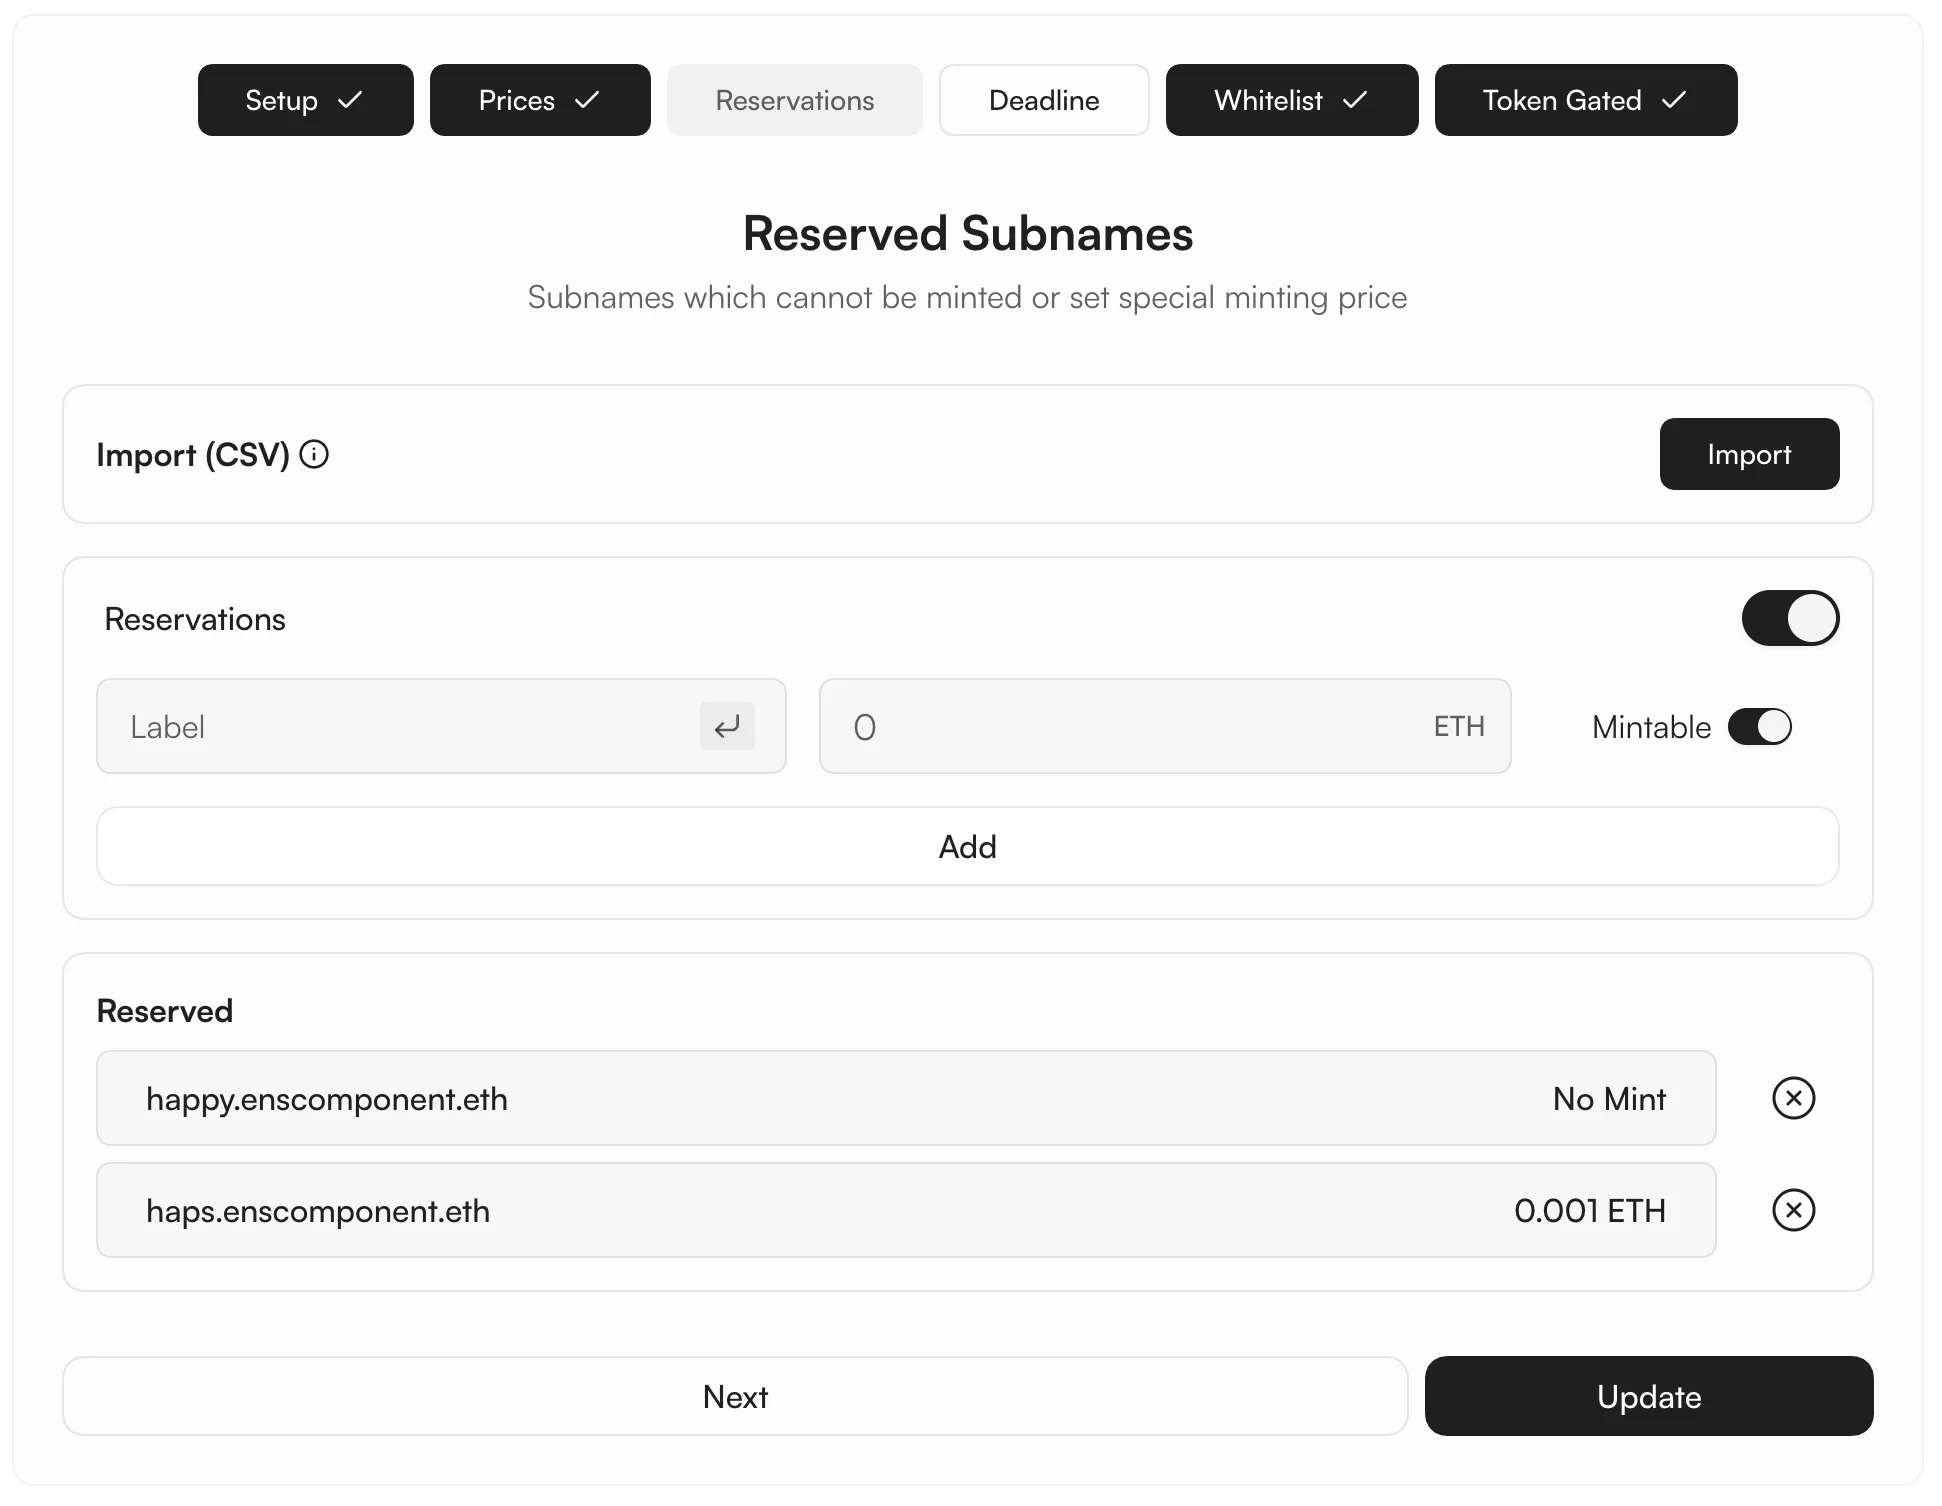
6
Deadline — set a minting cutoff (optional)
Toggle Use Deadline to make the collection time-bound. After the chosen date, no new subnames can be minted.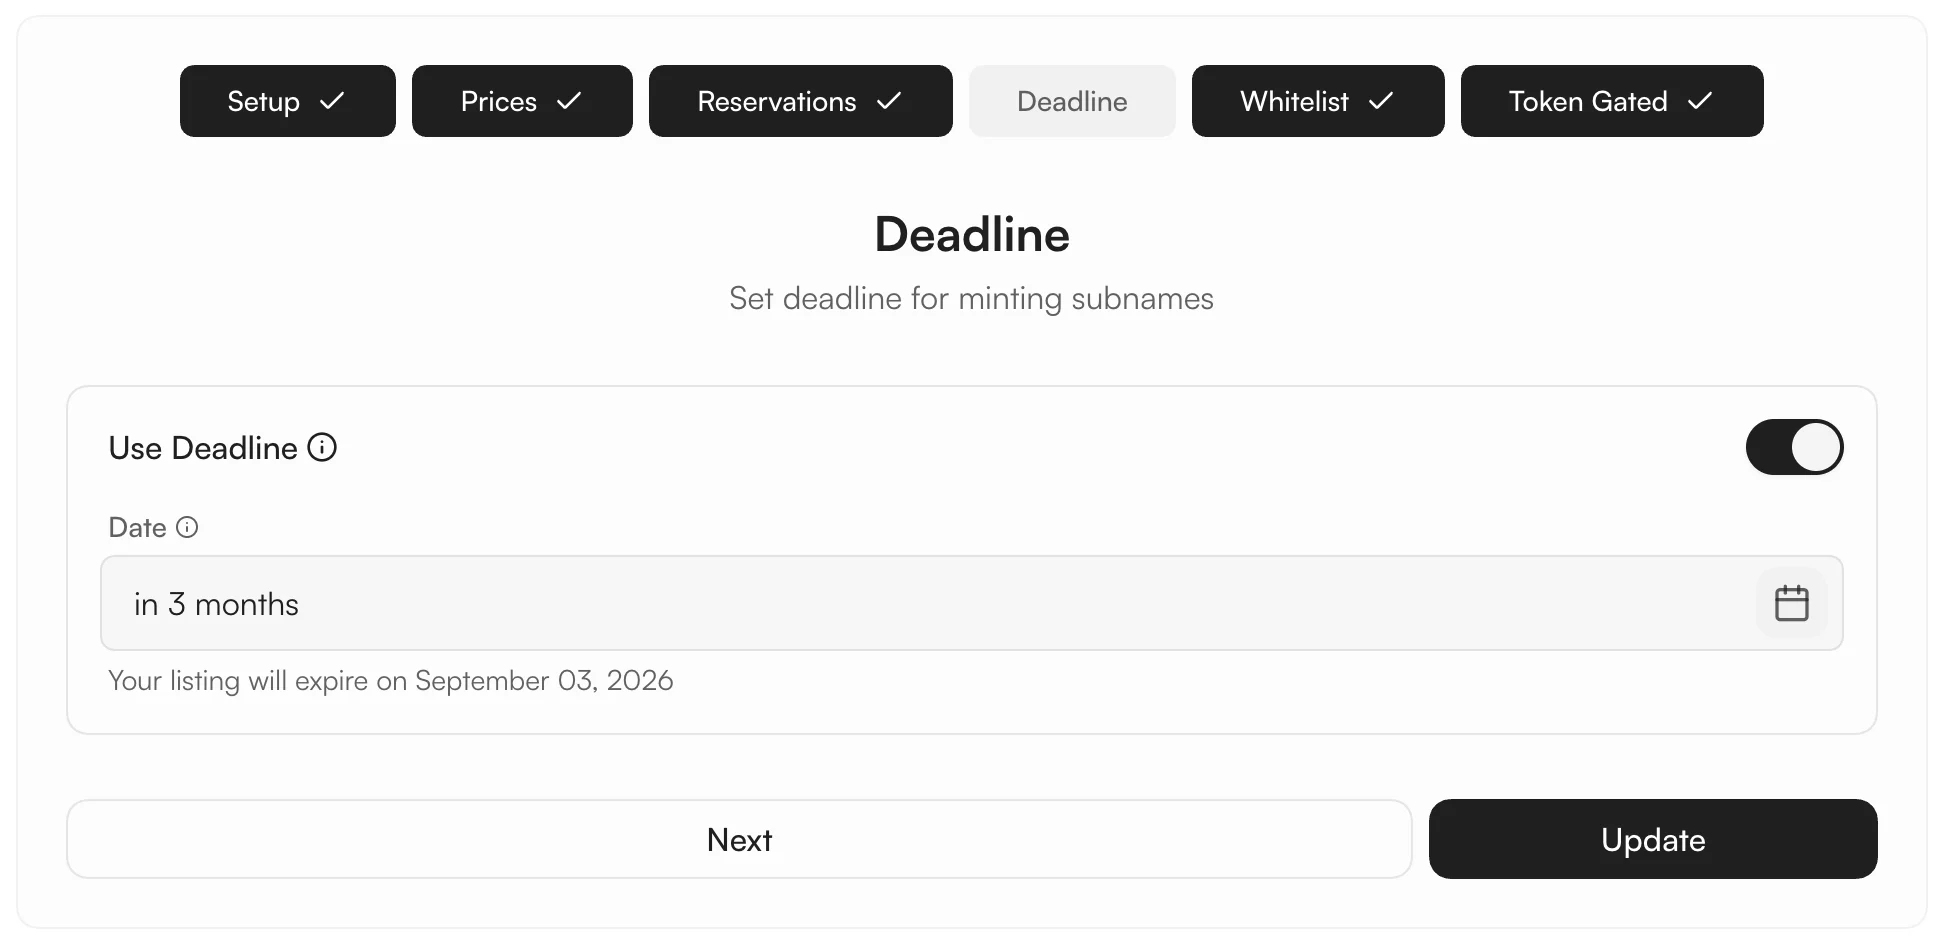
7
Whitelist — restrict who can mint (optional)
Toggle Use Whitelisting to gate minting by wallet address. Two modes: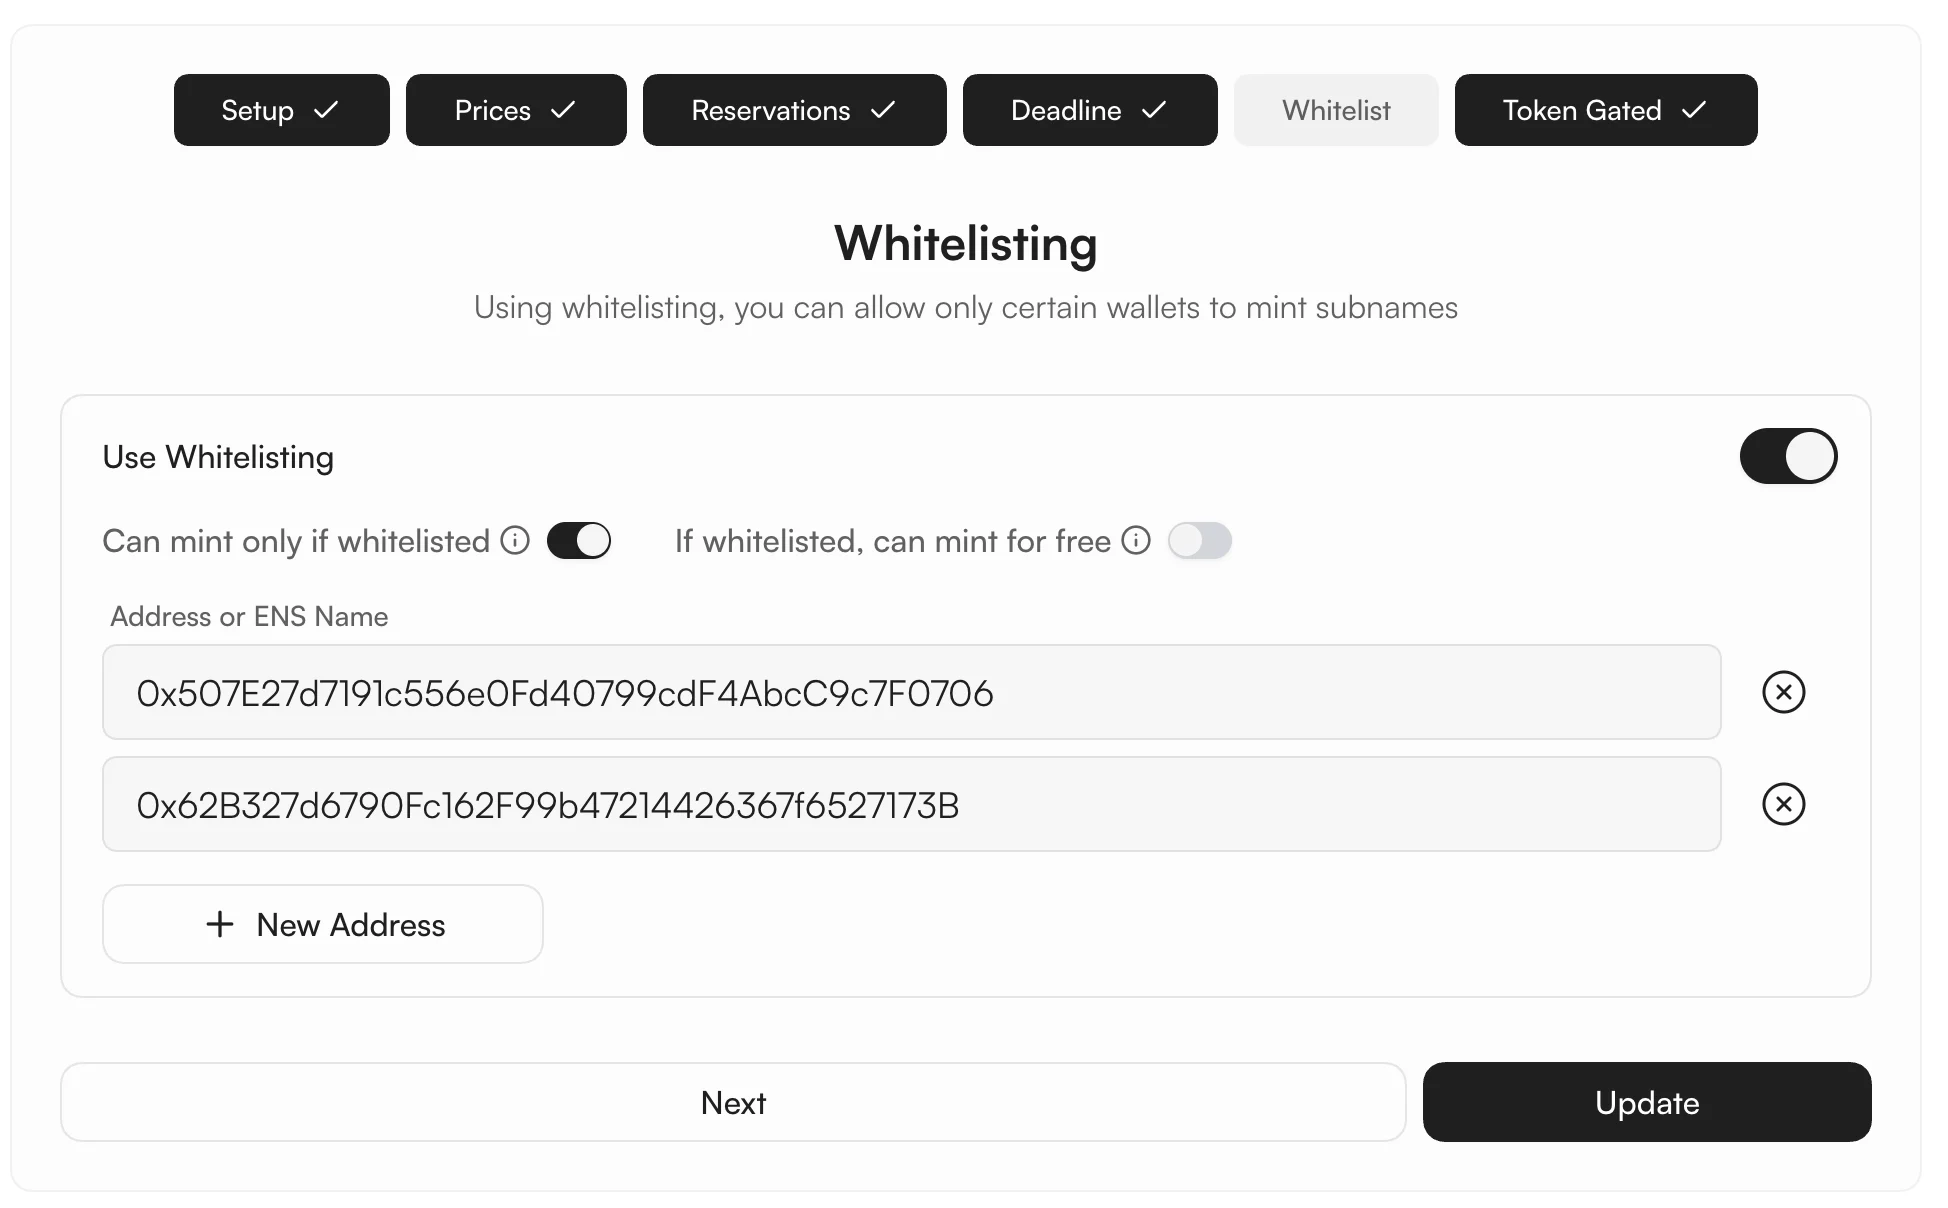
- Can mint only if whitelisted — restrict minting to listed wallets.
- If whitelisted, can mint for free — allowlisted wallets bypass the mint fee.
8
Token Gated — require token holdings (optional)
Toggle Use Token Gated Listing to require that minters hold a specific token: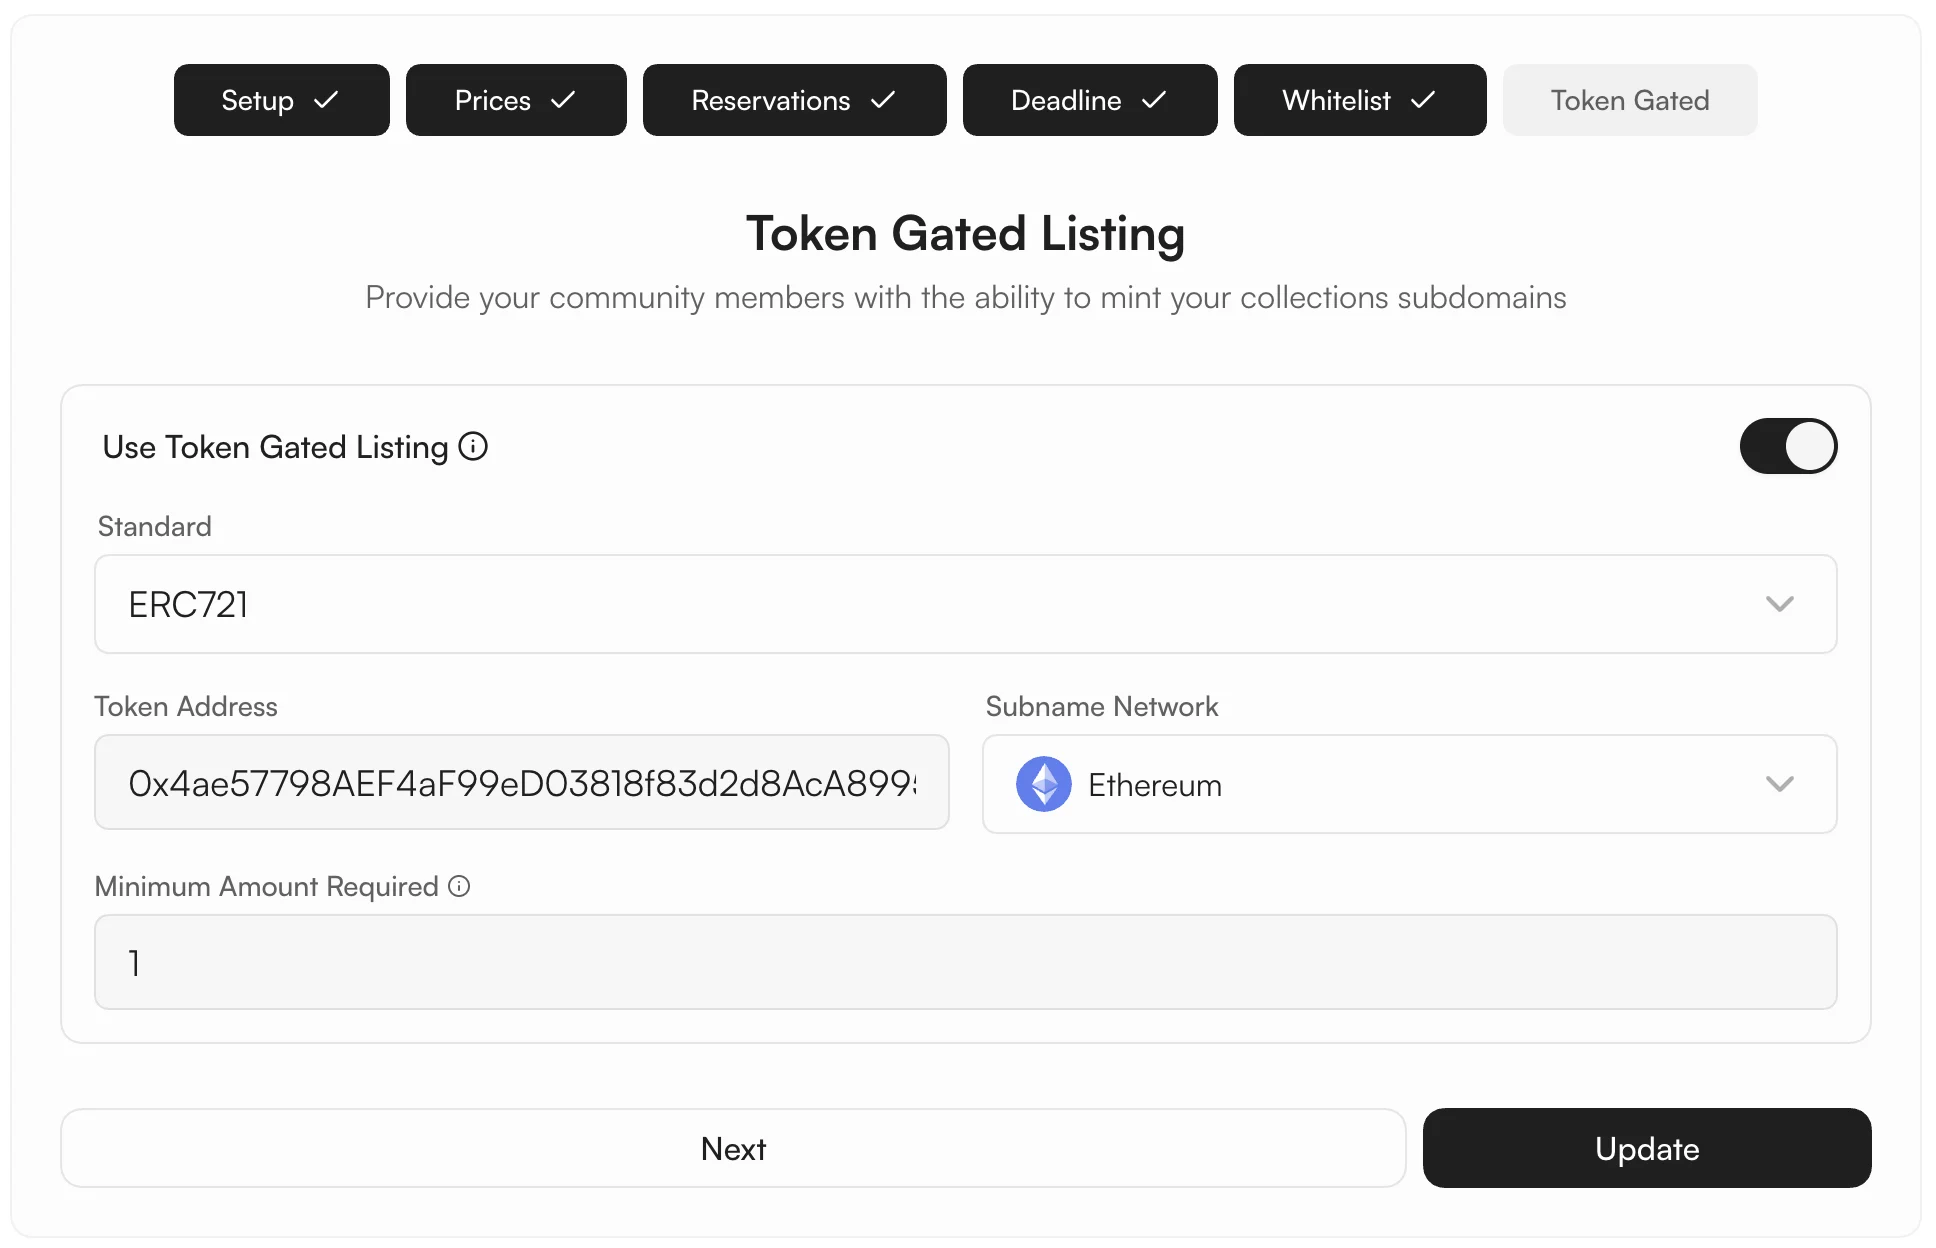
- Standard — ERC-20 or ERC-721.
- Token Address — contract address of the gating token.
- Subname Network — the chain the token lives on.
- Minimum Amount Required — minimum balance the wallet must hold to be eligible.
9
Activate the listing
Once all tabs are configured, click Activate. Sign the transaction in your wallet.
10
Deploy Registry
After activation, the app shows a “Few more steps before you can list your name” screen with two actions.Click Deploy Registry to deploy the Registry Contract on the selected L2 chain. This contract holds all subnames issued under your name.
11
Configure Resolver
Click Configure Resolver to point your ENS name’s resolver at the Namespace Hybrid Resolver. This is what makes subnames resolvable across the entire Web3 ecosystem.Confirm the transaction in your wallet.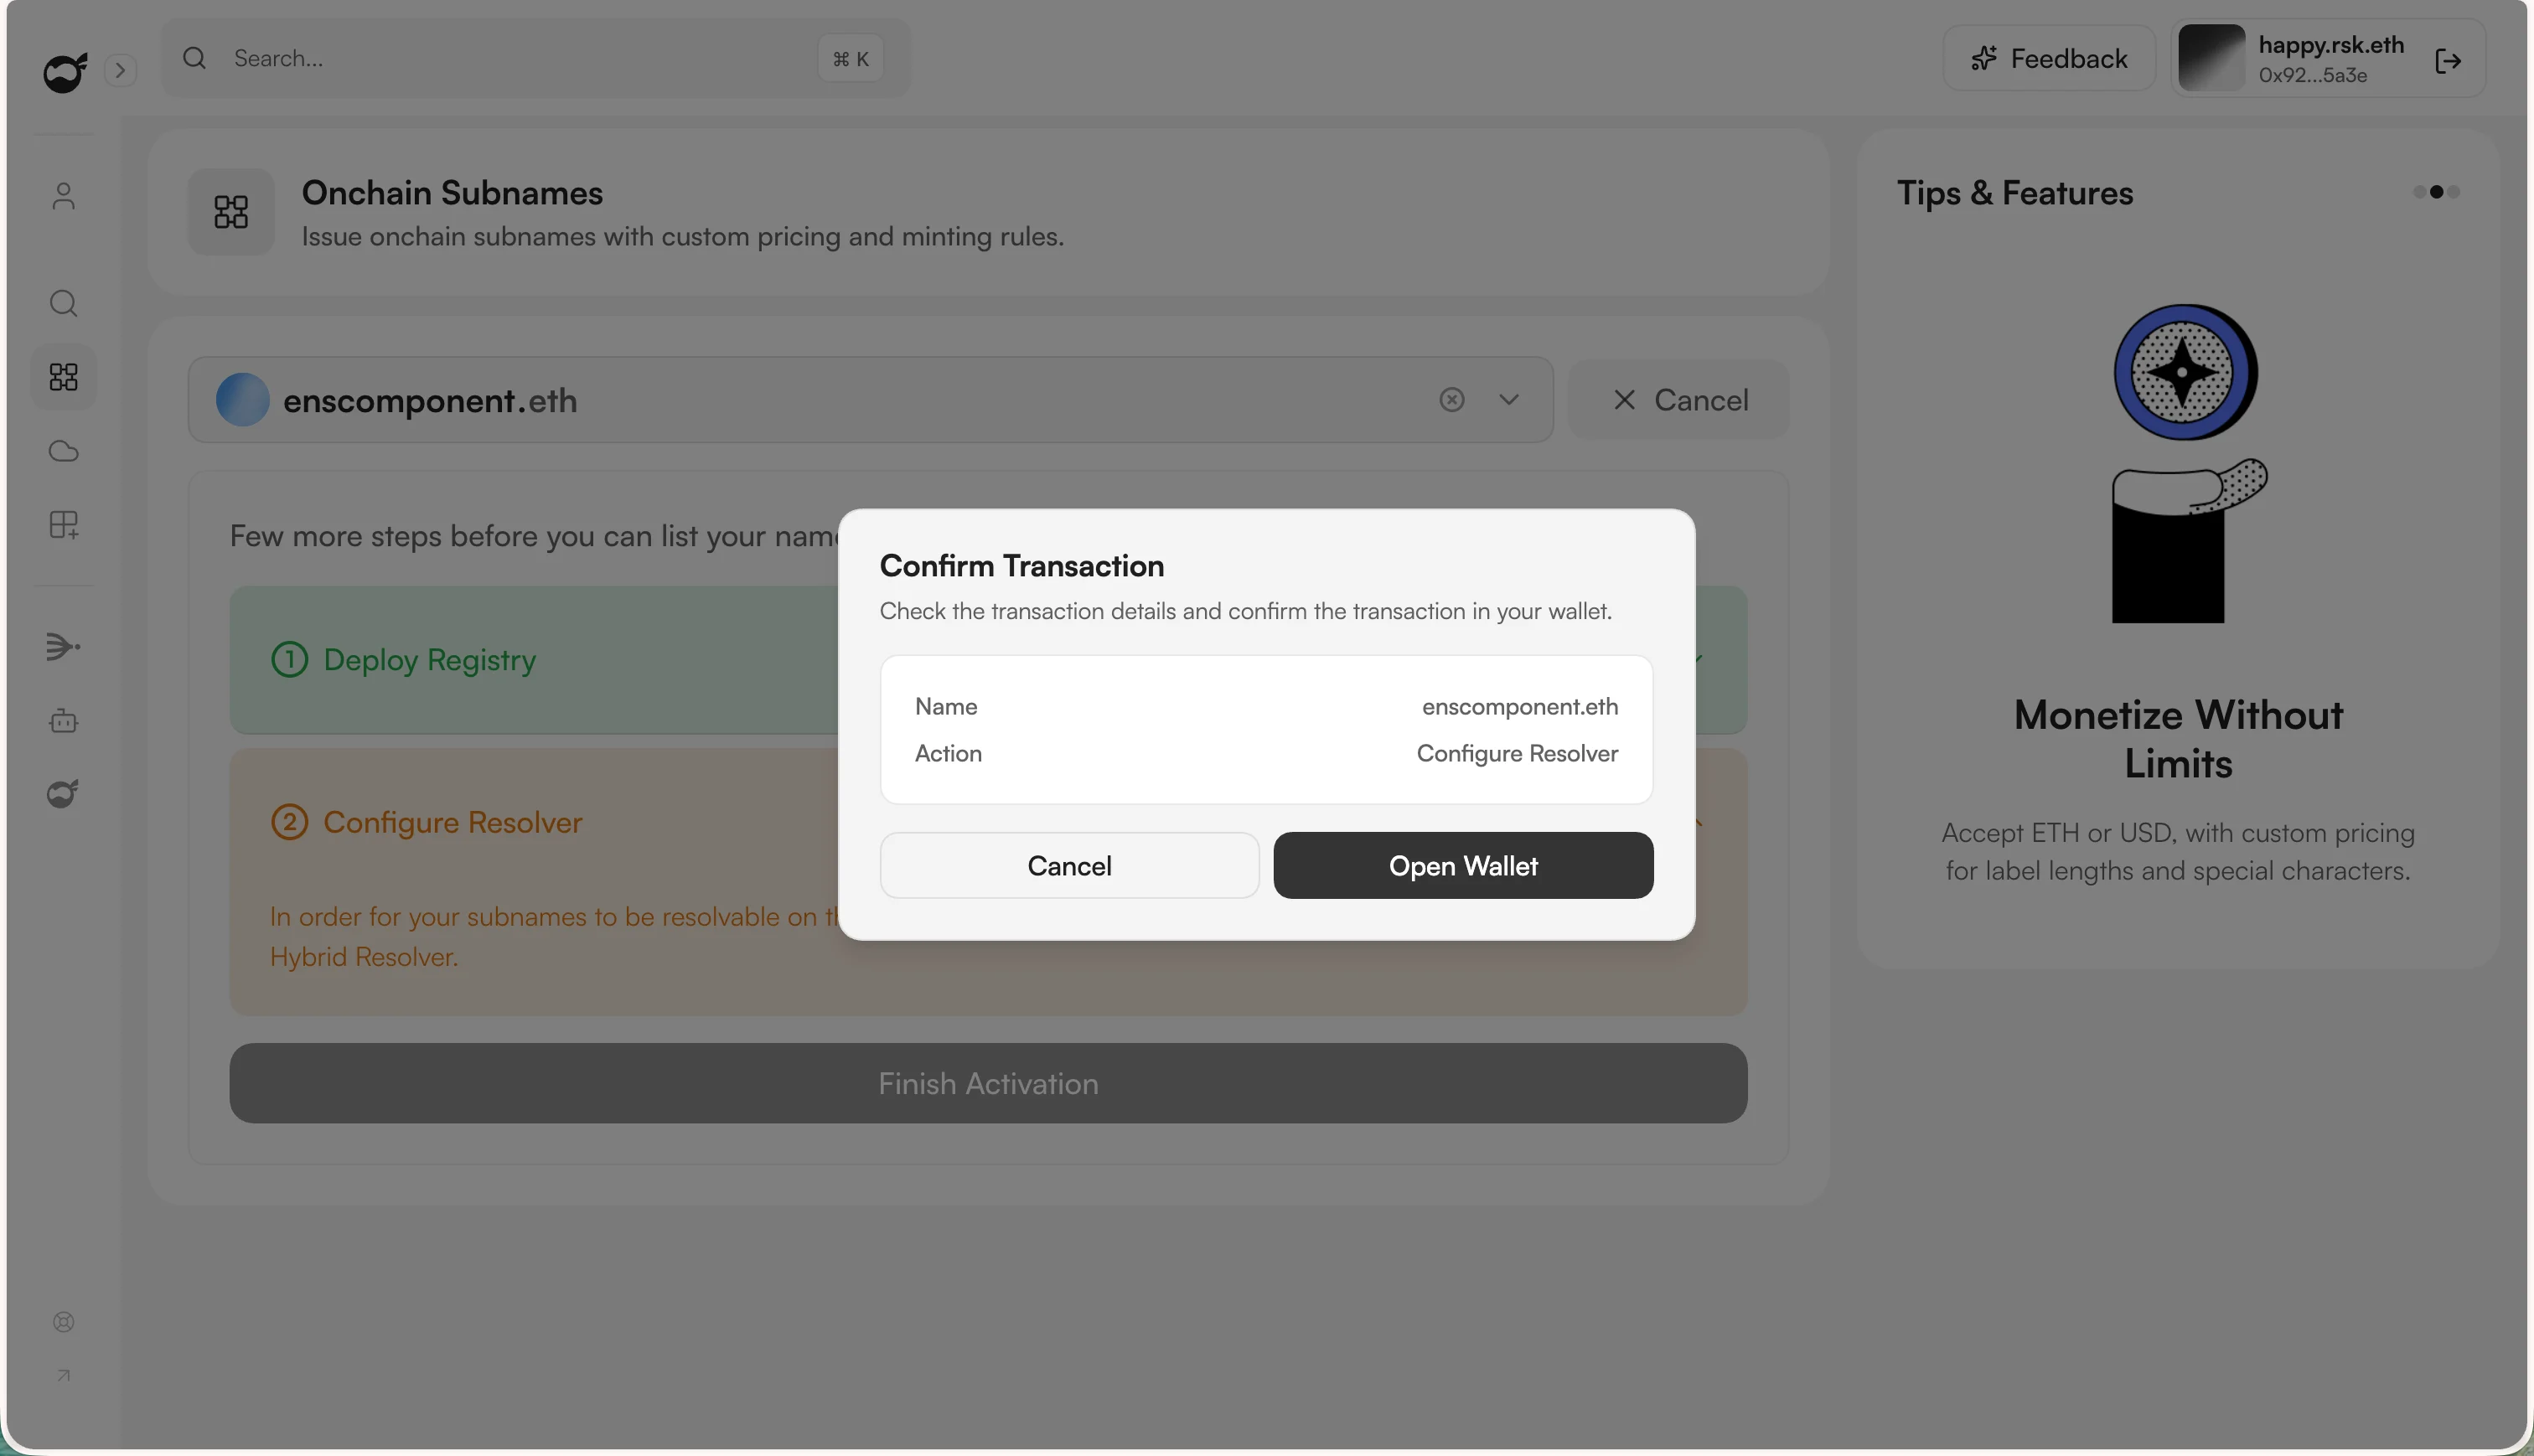
12
Finish Activation
Click Finish Activation. Your ENS name now shows an Activated badge, and you can start minting subnames from the same page or via the SDK / widget.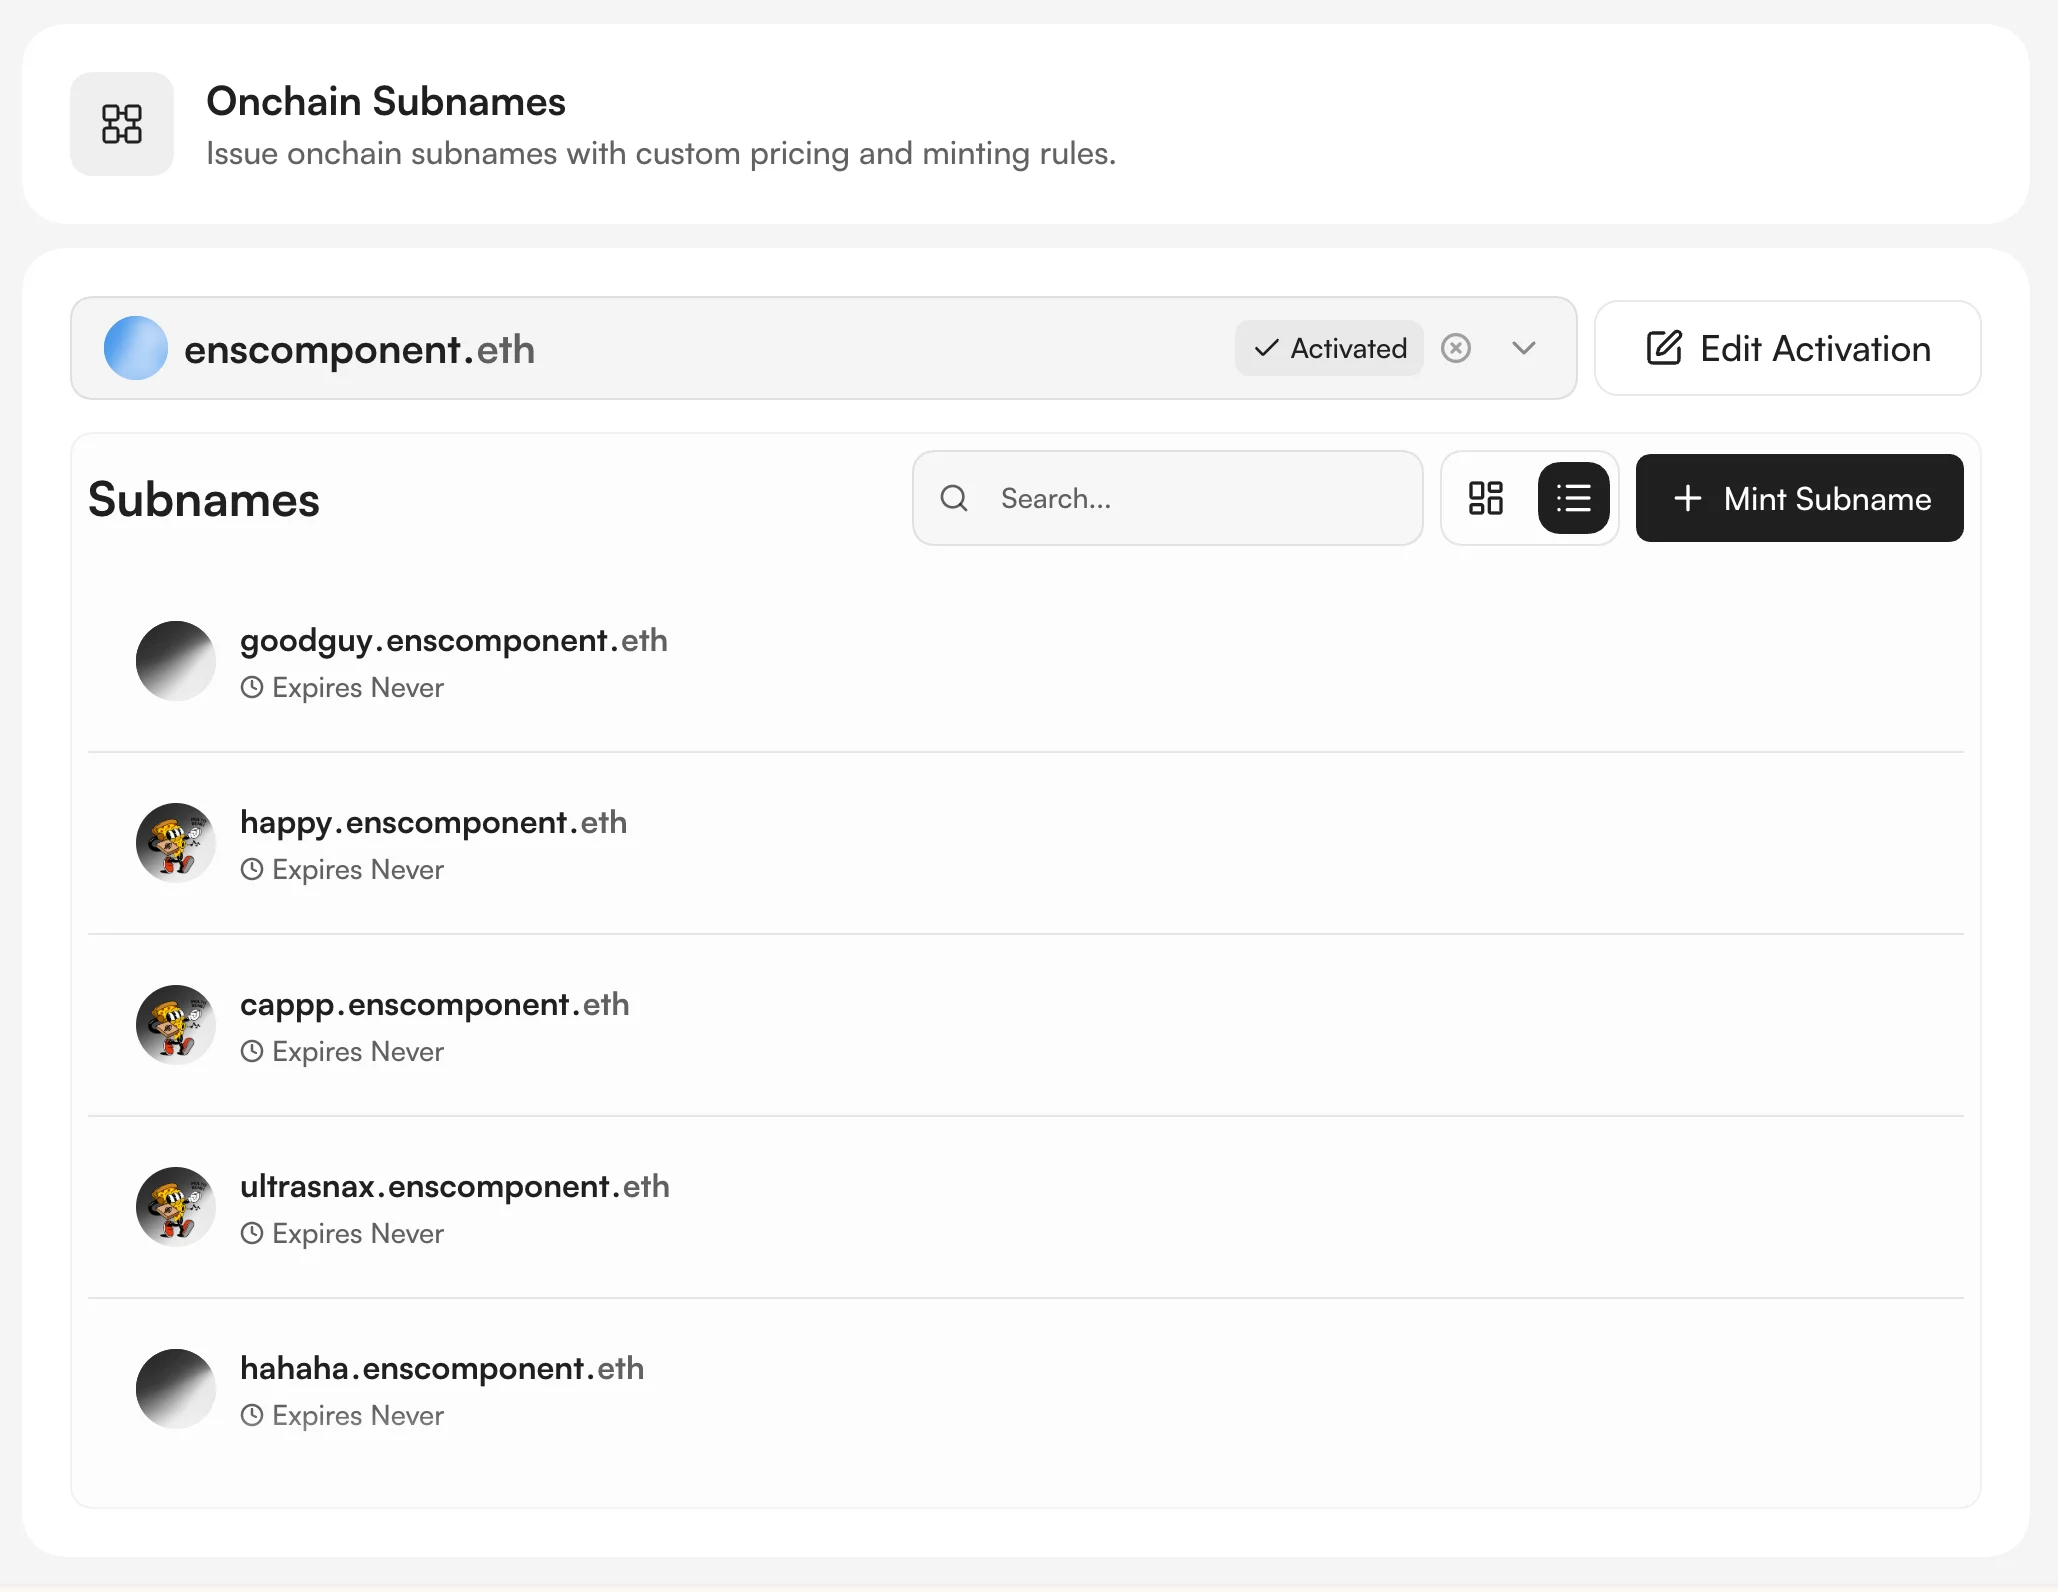
Next Steps
Your ENS name is now activated and ready for subname minting. Choose how to get started:Namespace App
Mint subnames directly from the Namespace App.
Embed ENS Widget
Embed a widget in your app to let users mint subnames.
Subpages
Launch a branded minting site quickly using our ready-made template.
Mint L1/L2 Guide
Learn best practices for minting subnames on L1 and L2.